How to Self-host Plausible analytics

Elvis Duru / August 9, 2021
9 min read • --- views
Introduction
Understanding user behavior is key to optimizing your website for key conversion metrics. Web analytics tools help you do that by collecting and providing you all the valuable traffic metrics of your users at a glance in a dashboard.
There are several web analytics tools out there with Google analytics being the top player, but I chose to settle with Plausible for my blog because:
- It's light-weight hence keeps my site speed fast
- It doesn't use cookies and other privacy-invasive tools
- It's simple to setup and integrate
- It's completely open source
Now that you know some important bits about analytics and Plausible, let's dive right in!
At the end of this tutorial, you'd have accomplished the following tasks:
- Provision your own server using Digital Ocean
- Self-host and configure Plausible analytics
- Add and setup your website for analytics
Step 1 - Provision Your Own Server
Before we can host plausible, you'll need a spin up a droplet at Digital ocean. Droplets are Linux-based virtual machines (VMs), in short, virtual servers that you can spin up very quickly.
If you're new to Digital Ocean, you can sign up and get $100 dollars free credits using this link.
Once you've done that you're ready to proceed.
Spinning Up a Droplet
- In your dashboard, create a new project or select an existing one.
- Navigate to the “Create” menu in the upper right corner and click “Droplets” to open the "Create Droplet" page.
- Choose an image - Click on the option for "Ubuntu 20.04 (LTS) x64".
- Choose a plan - Click on the "Basic" plan.
- For CPU Options, select the "Regular Intel with SSD" and the "$5/mo." options respectively.
- Choose a datacenter region - You can select the one closest to you and your users or leave the default option.
- In the "Select additional options" section, select "Monitoring"
- For "Authentication", you can choose to use SSH to connect to your droplet instance or "Create a root password". If you prefer SSH, which I recommend, follow the instructions provided on setting up a new SSH key.
- Finalize and Create - Select the number of droplets you wish to create, in our case you need to create just one. Name the droplet. Add tags or leave blank if you wish.
- Click "Create Droplet". You will be taken to a page showing the progress bar for the Droplet creation process. Take note of its IP address.

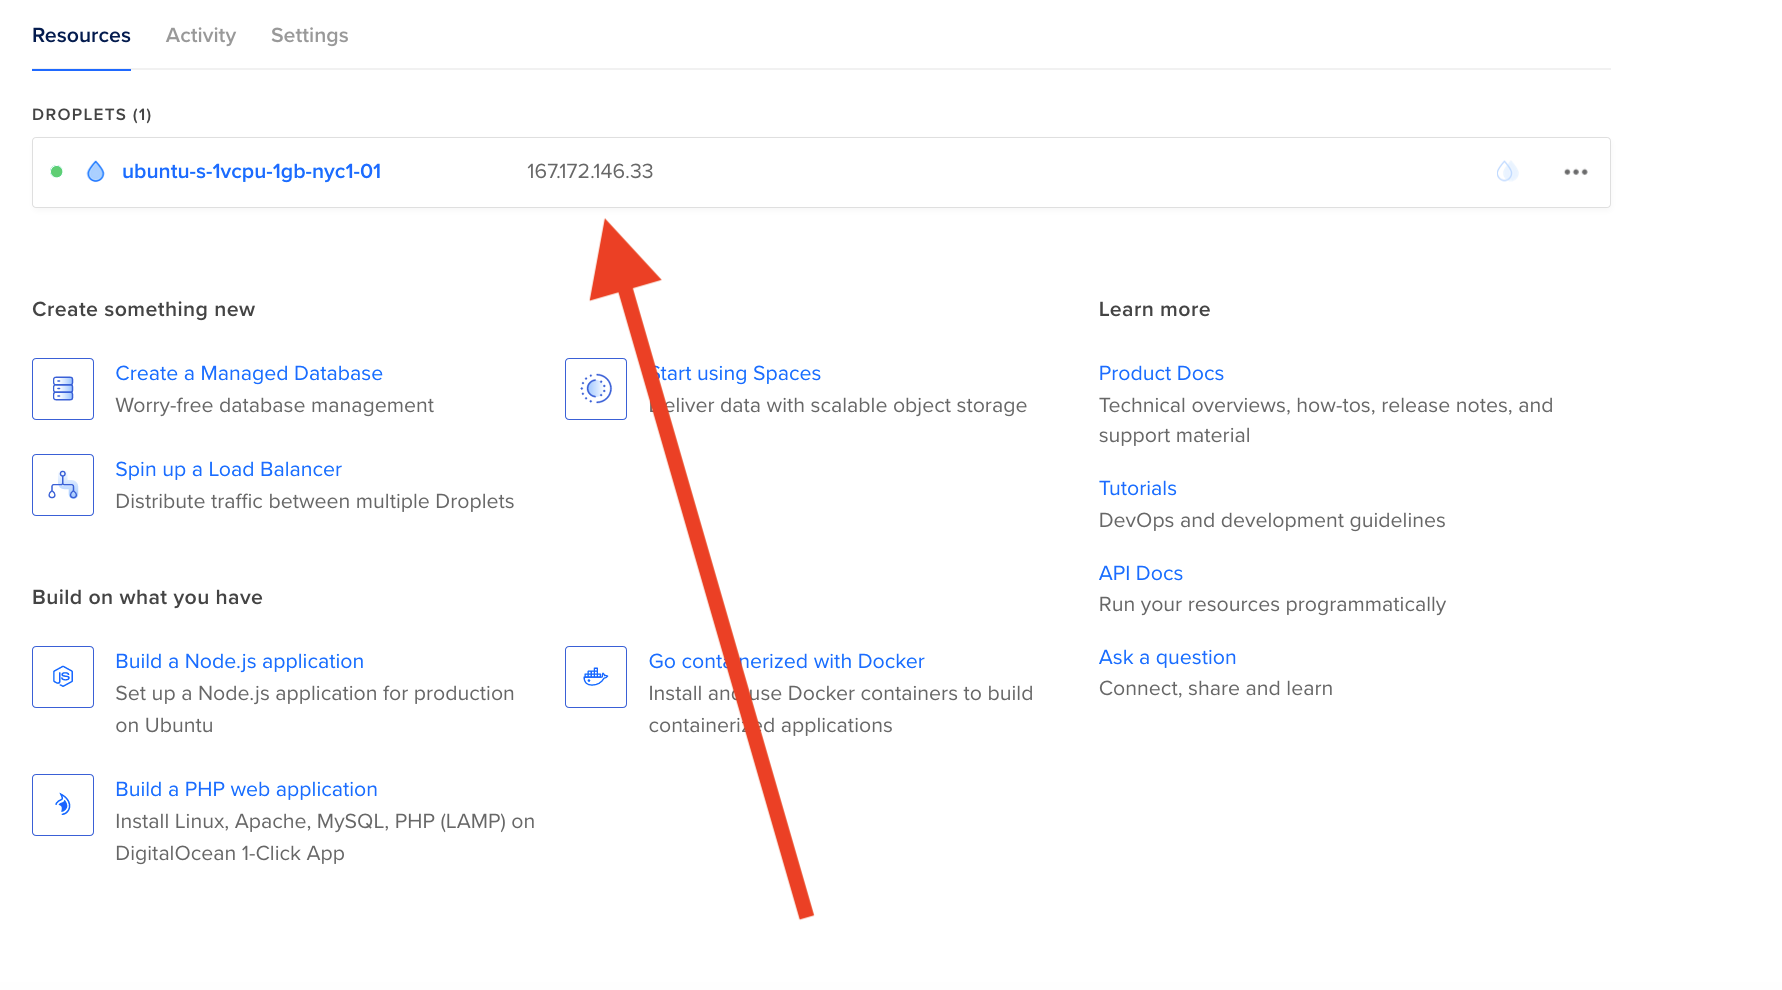
You will be using the IP address to connect securely to the droplet. Open your terminal and run the following:
ssh root@your_IP_address
You'll be asked for the passphrase you created when setting up SSH for your droplet. After you're logged in successfully, you will see the following:

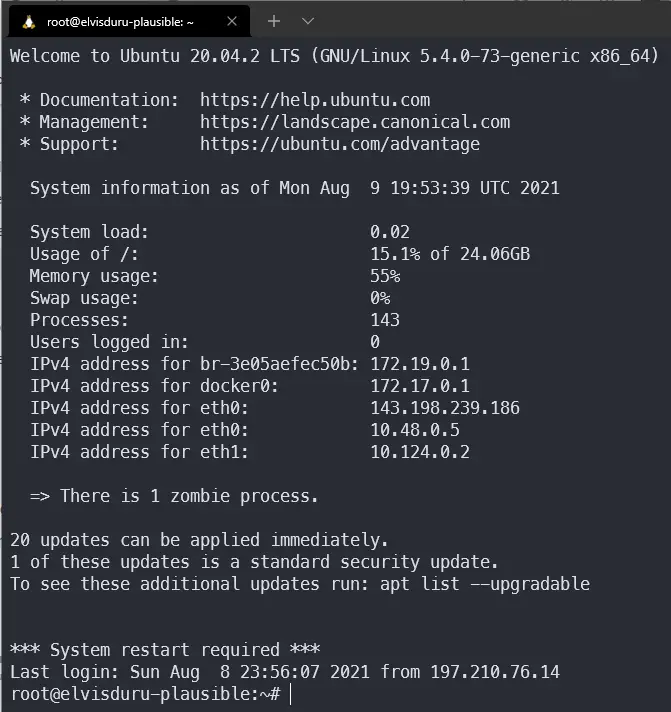
Now you're have your server ready, and you proceed to the next step.
Step 2 - Self-host and Configure Plausible Analytics
Before we can install Plausible we need to have docker installed. The following steps will help you do that:
Installing Docker
- Make sure your server is up to date by running the following commands.
sudo apt-get update && sudo apt-get upgrade
- You'll install docker using the convenience script provided by the Docker team.
curl -fsSL https://get.docker.com -o get-docker.sh
sudo sh get-docker.sh
- You can add your user to the Docker group, so you don't have to type in your
sudopassword every time you execute thedockercommand.
sudo usermod -aG docker ubuntu
- You will also need to install Docker Compose. Run the following commands.
sudo curl -L "https://github.com/docker/compose/releases/download/1.29.2/docker-compose-$(uname -s)-$(uname -m)" -o /usr/local/bin/docker-compose
sudo chmod +x /usr/local/bin/docker-compose
At the time of writing, the version of compose was 1.29.2. You can find the latest version here.
Installing Plausible
Now that we have docker installed and configured correctly, it's time to get Plausible up and running!
Clone the hosting repository
- Make sure you're in the home directory by running the following.
cd ~
- Clone the
plausible/hostingrepo
git clone https://github.com/plausible/hosting
cd hosting
You'll find two important files in the just downloaded directory:
docker-compose.yml- installs and orchestrates networking between the Plausible server, a Postgres database, a Clickhouse database and an SMTP server. It has default configurations that are ready to go, but you may adjust it if you wish.plausible-conf.env- configures the Plausible server. You can find the configuration options documented here.
- Generate and copy a random 64-character secret key that will be used to secure the app. You can run this command to generate one:
openssl rand -base64 64
- Edit the
plausible-conf.envfile to add your config variables
nano plausible-conf.env
Here's an example of a valid configuration. Edit it with your own values:
ADMIN_USER_EMAIL=john@your-domain.com
ADMIN_USER_NAME=john
ADMIN_USER_PWD=testing123
BASE_URL=https://plausible.your-domain.com
SECRET_KEY_BASE=N5I8aTKyQI4JtYD4h5k/hd+sHi3h2uz/cO+RhCv0ed88+5an//dEW1kbnQCFOMhU
y0venoG8ZUdY/w0Ya2BStg==
- Save the file.
Starting Plausible
After saving the configuration file with the correct values, run the following command:
docker-compose up -d
You should see the following output once its finished.
Creating hosting_mail_1                ... done
Creating hosting_plausible_db_1        ... done
Creating hosting_plausible_events_db_1 ... done
Creating hosting_plausible_1           ... done
At this stage, you should be able to navigate to the plausible service by typing your Droplet's IP Address from Step 1.


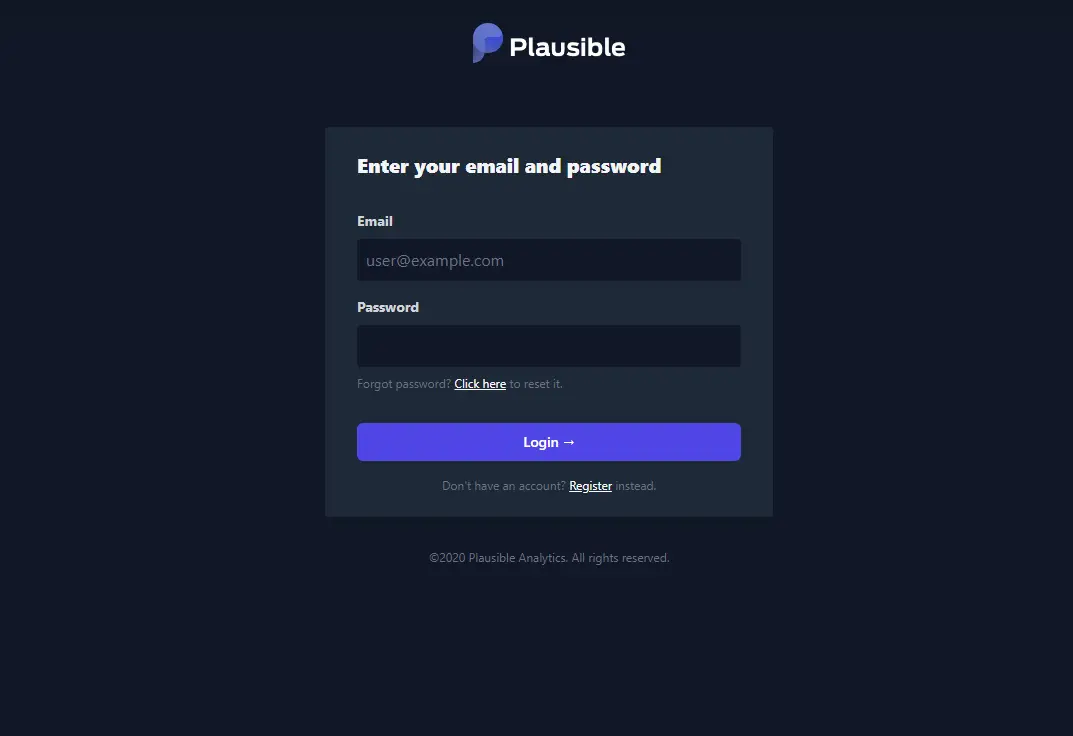
Logging in and activating your account
-
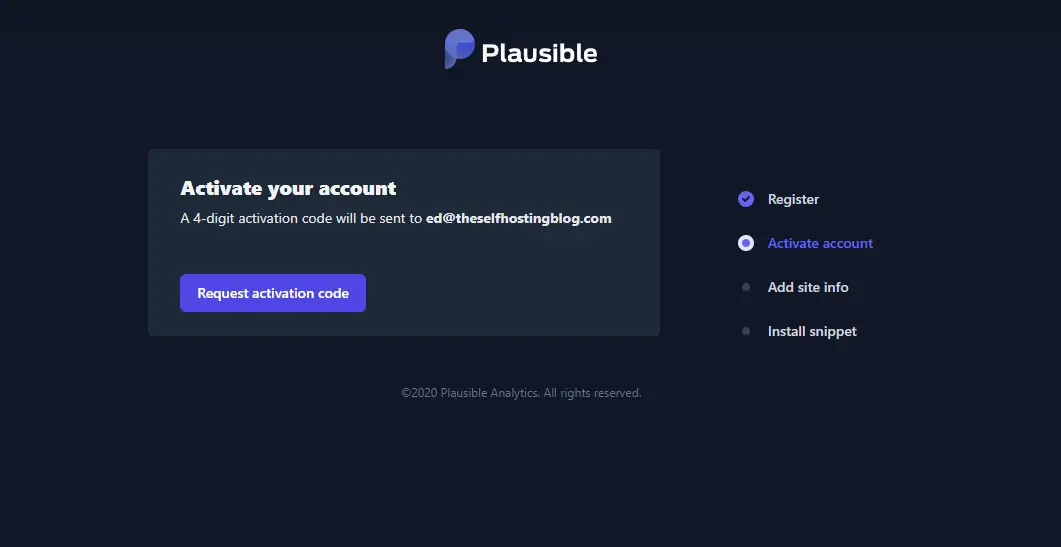
You can login using the credentials you setup in the Installing Plausible section.
After logging in, click on the
Request activation codebutton and in a few moments you should receive an email with an activation code. You may want to check your spam folder just in case.

- Enter the code that you received.

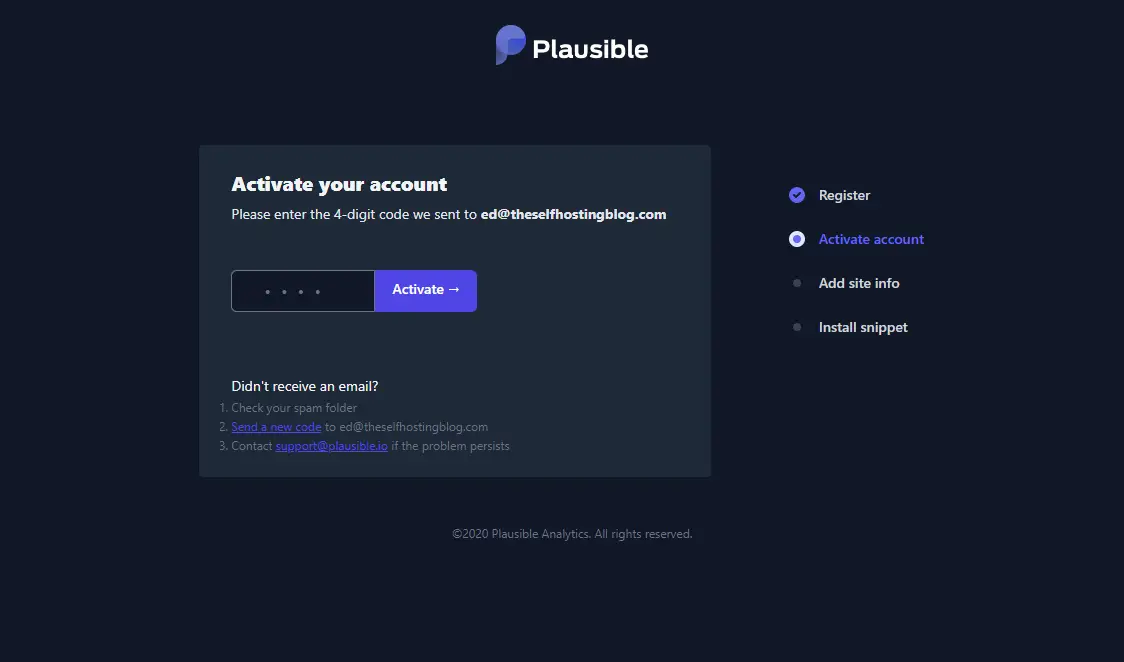
- If you didn't receive the activation email. You can use the following command to manually activate your account.
docker exec hosting_plausible_db_1 psql -U postgres -d plausible_db -c "UPDATE users SET email_verified = true;"
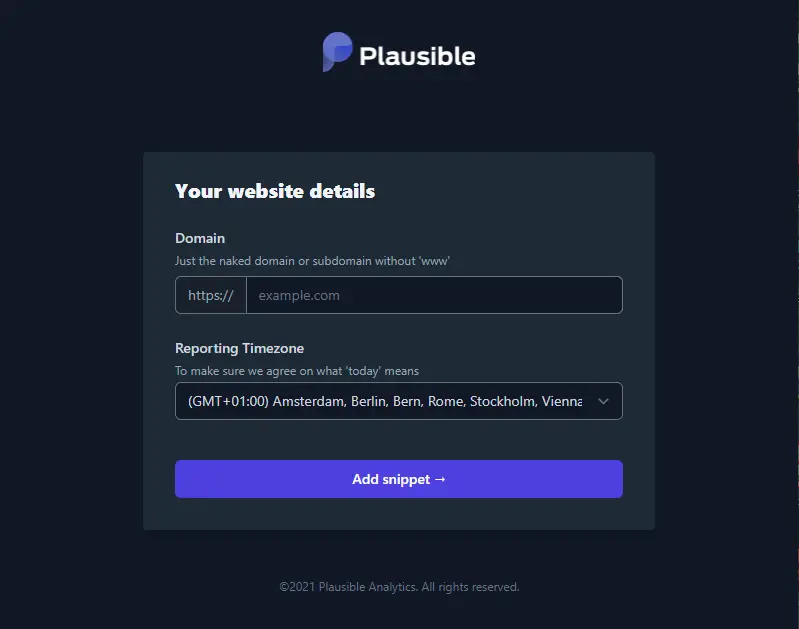
- Next, enter the domain name of the website you want to track and your time zone. Click on the
Add snippetbutton to go to the next step.

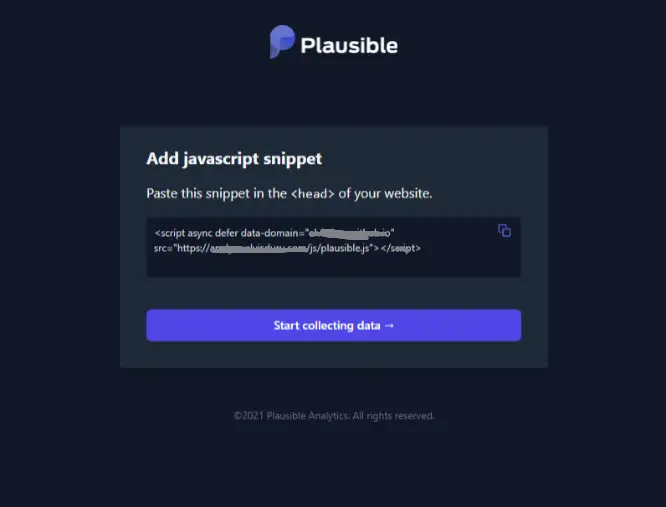
- Add the script to your website and then click on
Start collecting data.

Great! We're almost done!
Step 3 - Configure Nginx
You'll need to configure Nginx on your droplet to allow you point a domain name at your Plausible.io instance.
Install Nginx
Execute the following command to install Nginx. apt will install Nginx and any required dependencies.
sudo apt-get install nginx
Adjust the Firewall
Run the following command to list app configurations that ufw knows:
sudo ufw app list
You'll get the following output:
Available applications:
  Nginx Full
  Nginx HTTP
  Nginx HTTPS
  OpenSSH
There are three profiles listed for Nginx:
- Nginx Full: This profile opens both port 80 (normal, unencrypted web traffic) and port 443 (TLS/SSL encrypted traffic)
- Nginx HTTP: This profile opens only port 80 (normal, unencrypted web traffic)
- Nginx HTTPS: This profile opens only port 443 (TLS/SSL encrypted traffic)
We want to use both ports, so you should run the following:
sudo ufw allow 'Nginx Full'
Verify the change by running:
sudo ufw status
Next, we check if Nginx is running:
sudo systemctl status nginx
You'll see an output that resembles this:
● nginx.service - A high performance web server and a reverse proxy server
   Loaded: loaded (/lib/systemd/system/nginx.service; enabled; vendor preset: enabled)
   Active: active (running) ...
This next part allows incoming traffic to point to your Plausible instance.
Navigate to /etc/nginx
cd /etc/nginx
Open the Nginx config file using your favorite text editor. I'm using nano
sudo nano nginx.conf
Replace the server {} block with the snippet below. Be sure to substitute example.com with the actual domain name you configured in the plausible config file at Step 2.
server {
	# replace example.com with your domain name
	server_name example.com;

	listen 80;
	listen [::]:80;

	location / {
		proxy_pass http://127.0.0.1:8000;
		proxy_set_header X-Forwarded-For $proxy_add_x_forwarded_for;
	}
}
Save, quit and restart Niginx.
sudo systemctl restart nginx
Enable HTTPS using Certbot
Certbot generates SSL certificates for any of your domain names for free with Let's Encrypt. To install Certbot, run the following command:
sudo apt-get install certbot python-certbot-nginx
Then, to set up your SSL certificate, run
sudo certbot
Follow the instructions, select your domain name from the list and also select redirect to redirect any HTTP requests to HTTPS.
Conclusion
Congratulations, if you followed the steps successfully, you should have your own self-hosted instance of plausible running on your server. You can always check back to see if you're getting any visits in your Plausible dashboard by visiting the base-url you configured or the Droplet's IP address.

Thanks for reading! if you enjoyed this post or it helped in any way please consider joining other passionate developers who receive the best articles from our weekly newsletter. If you faced any issues during the setup, be sure to reach me on Twitter @elvisduru.
Supporting Plausible
The team at Plausible are doing a fascinating job, they're completely open-source and have allowed the community to self-host their product. I'm running a self-hosted instance of Plausible for my blog. To send support to the developers, you have the option of becoming a sponsor. Here's an official note from Plausible.
Self-hosting our analytics product is free as in beer. You only need to pay for your server and whatever cost there is associated with running a server. You never have to pay any fees to us, only to your cloud server provider. If you choose to self-host Plausible you can become a sponsor which is a great way to give back to the community and to contribute to the long-term sustainability of the project. Simply put, we treat sponsors like paying customers which means you can receive guaranteed priority support.